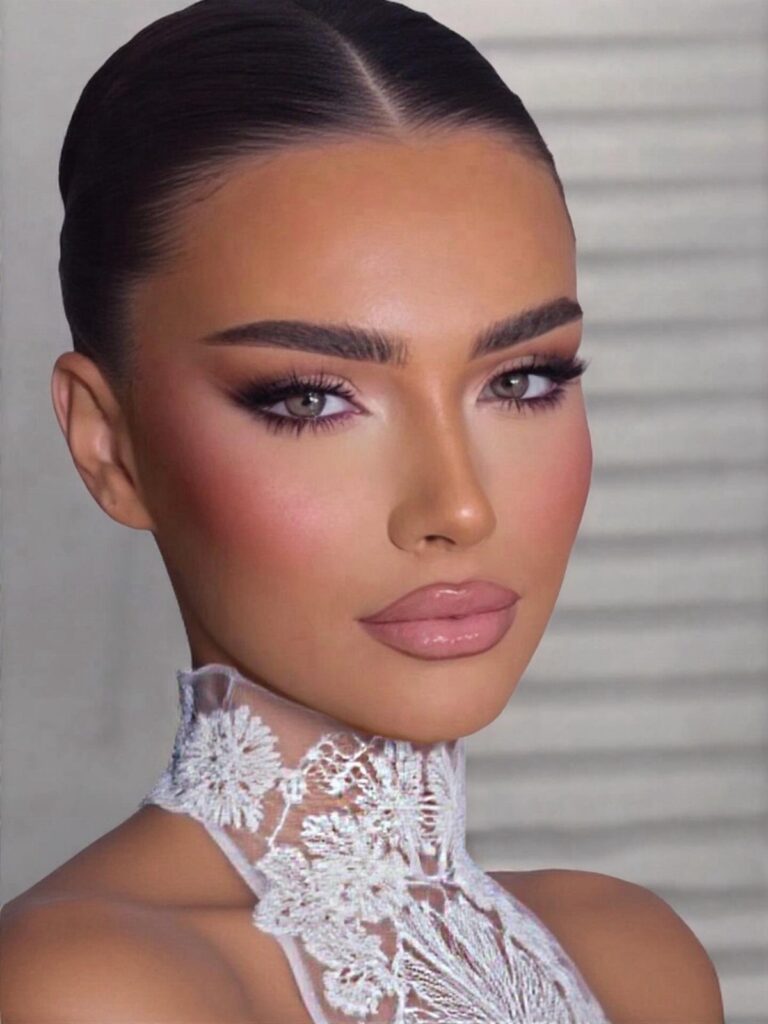
A sheer foundation and balm-tinted lips sit at one end of this range, while smoke and shimmer with starry studded lids sits at the other.
Setting spray applied in an X and a T locks the look in place, but powder only belongs on your T-zone when keeping hold without flattening dimension.
1. Soft Glam
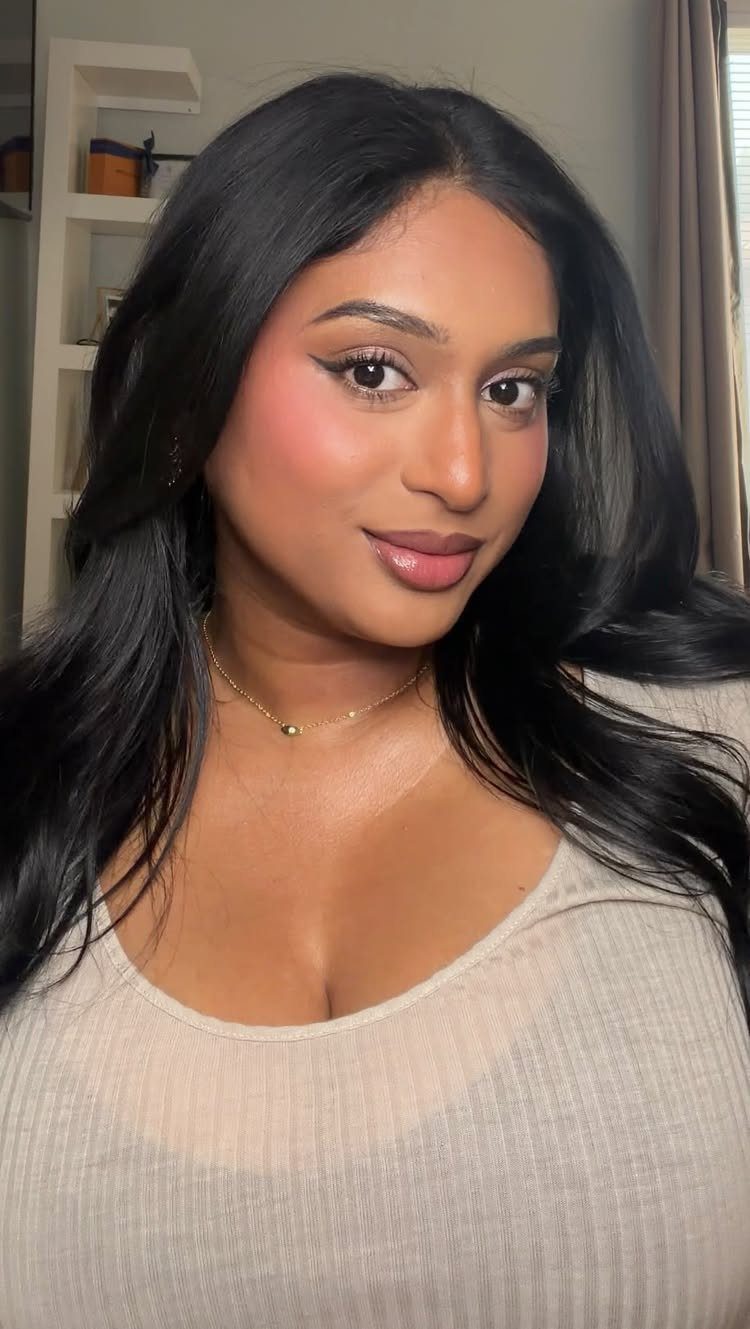
This look layers neutral tones with just enough intensity to hold up in wedding photos without tipping into full drama.
The eyes get attention through blended shadow in warm browns or soft taupes, a clean liner line, and mascara that opens the lashes. Cheeks stay sculpted but subtle, with a bronzer that adds dimension rather than color.
The lip pulls it together with a satin or matte finish in rose, mauve, or nude pink. Everything photographs well and lasts through a long event without constant touch-ups.
2. Natural Wedding Makeup
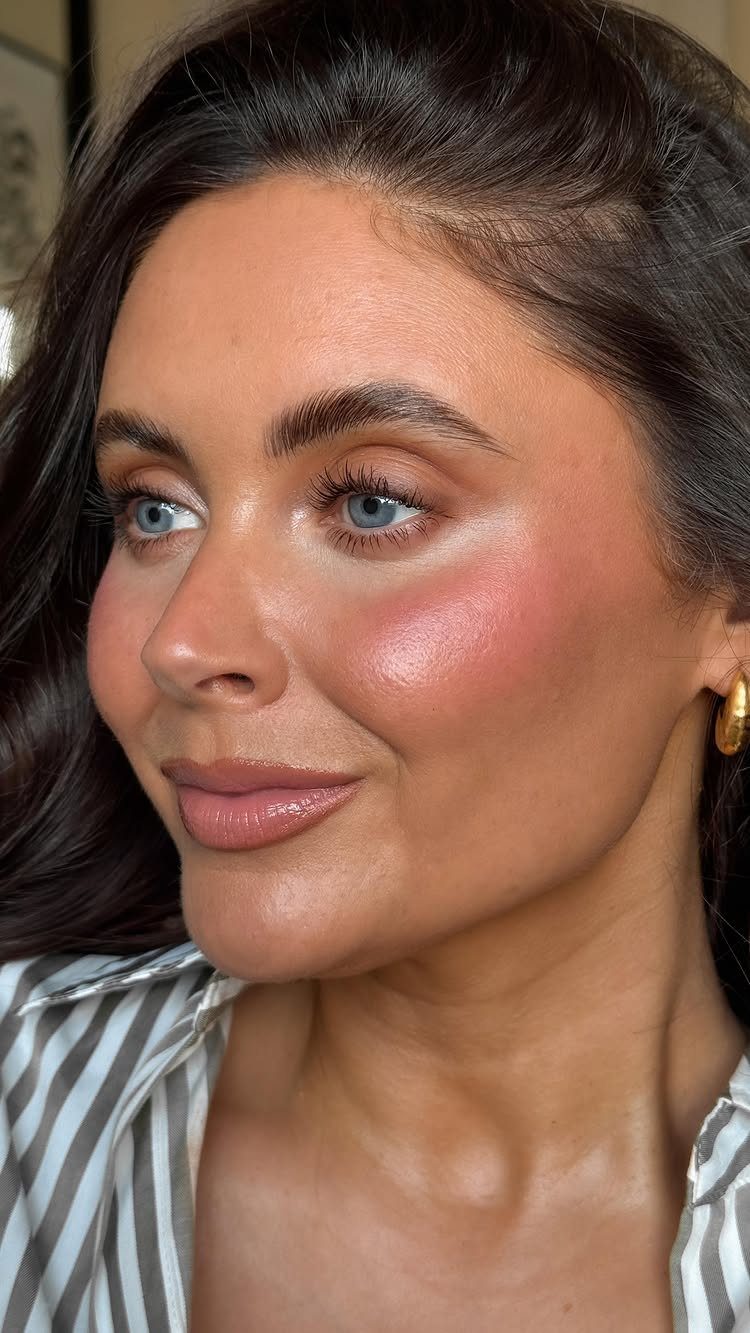
The goal here is to look like yourself on a good day, not someone else entirely.
Coverage stays light, often just a tinted moisturizer or a sheer foundation that lets real skin show through. Eyes get a wash of neutral shadow, maybe a coat of mascara, and brows stay groomed but not filled heavily.
Blush goes on in a shade close to your natural flush.
Lips take a balm or a sheer gloss. This approach works when you prefer minimal makeup or when the dress and accessories already carry the outfit.
“There’s a misleading concept that you have to do a lot more makeup for weddings for the cameras, which is true to a degree, but that doesn’t mean a drastic makeover where you end up looking unrecognizable.”
— Glamour
3. Glitter Eyes
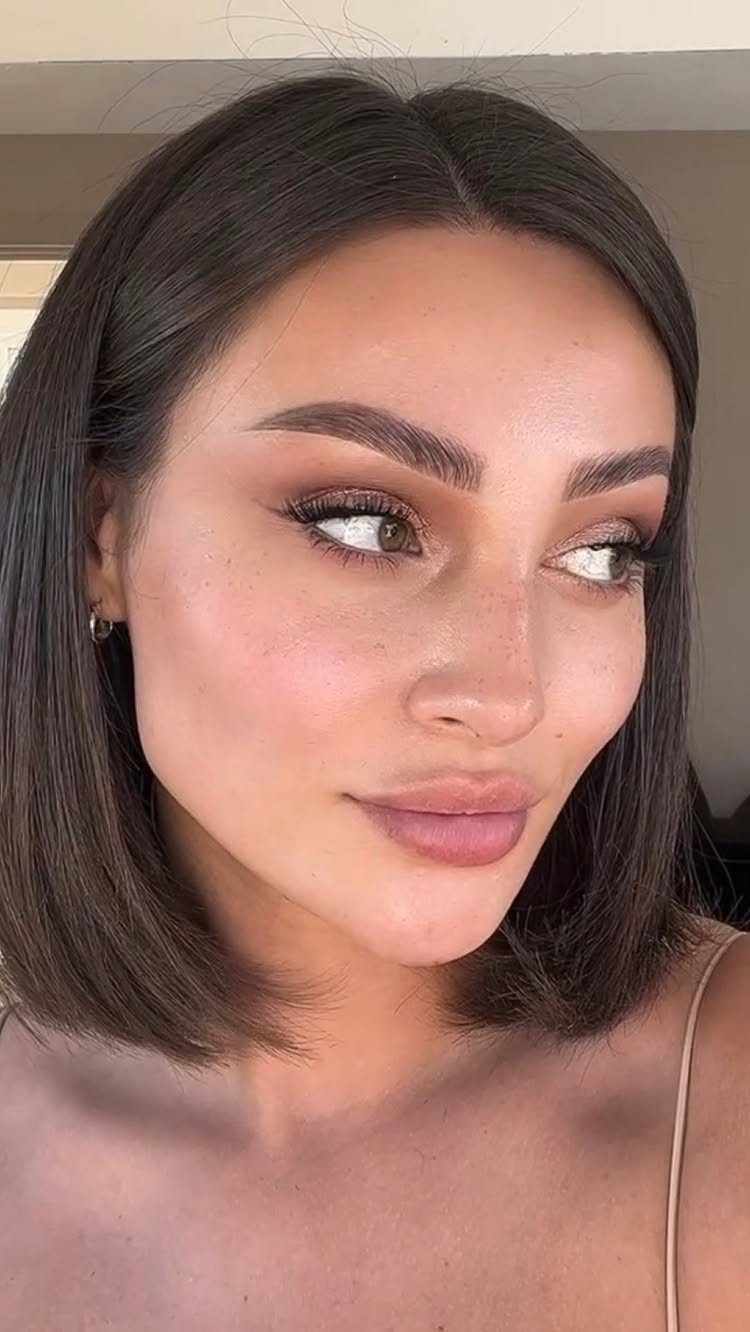
A swipe of shimmer across the lid adds a festive edge without requiring advanced blending skills.
The glitter here reads gold in daylight and catches indoor lighting at the reception. Keep the rest of the face balanced: a neutral or pink lip, soft blush, and brows that frame without competing.
Application is simple. Pat the shadow onto the lid with a finger or a flat brush, then blend the edges with a transition shade for a softer border.
Skip glitter if the venue is very formal or if your outfit already has metallic details.
4. Dewy Skin
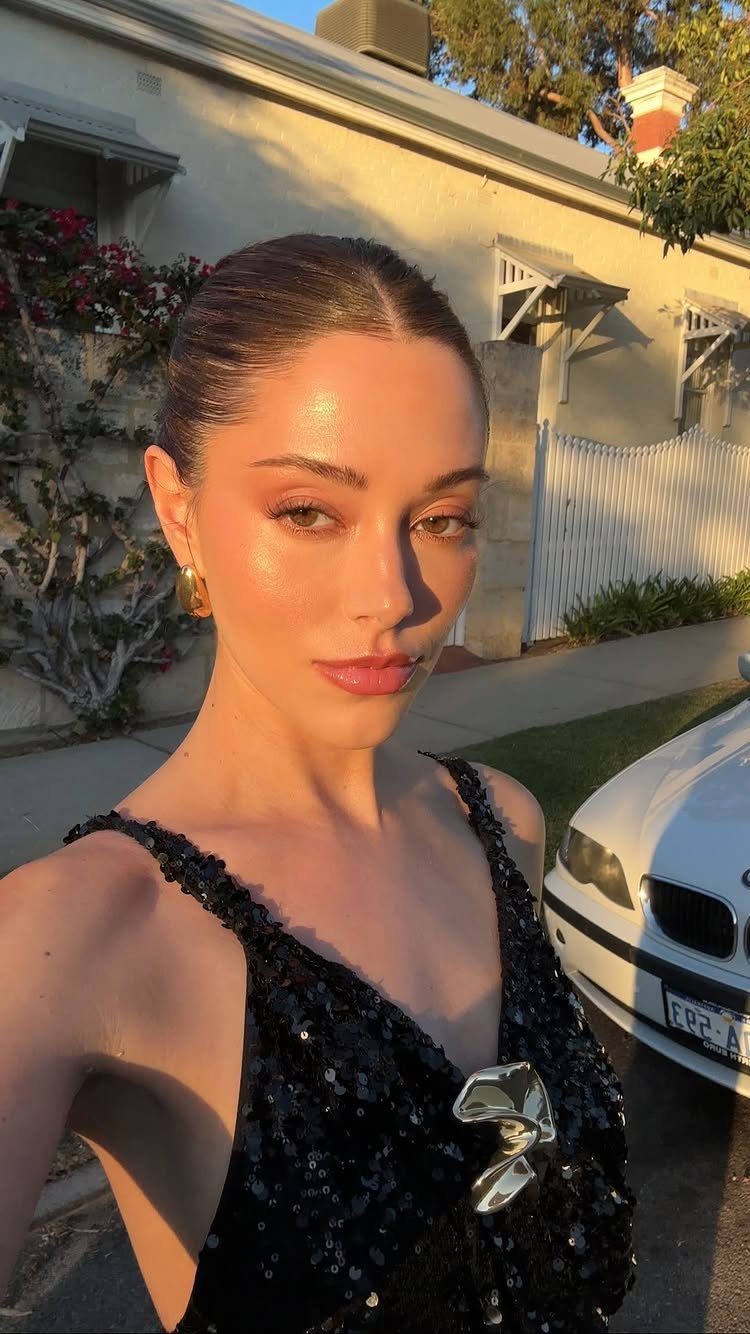
The finish comes from prepping skin with a hydrating serum or primer, then layering a luminous foundation or skin tint that reflects light rather than absorbing it.
A liquid highlighter mixed into foundation or applied to the high points of the face gives that wet look without actual shine.
Set only where you need it, usually the T-zone, and leave the cheeks and temples dewy.
This look photographs especially well in natural light and flatters dry or mature skin. It does require touch-ups if the event runs hot or humid.
5. Eye Makeup Definition
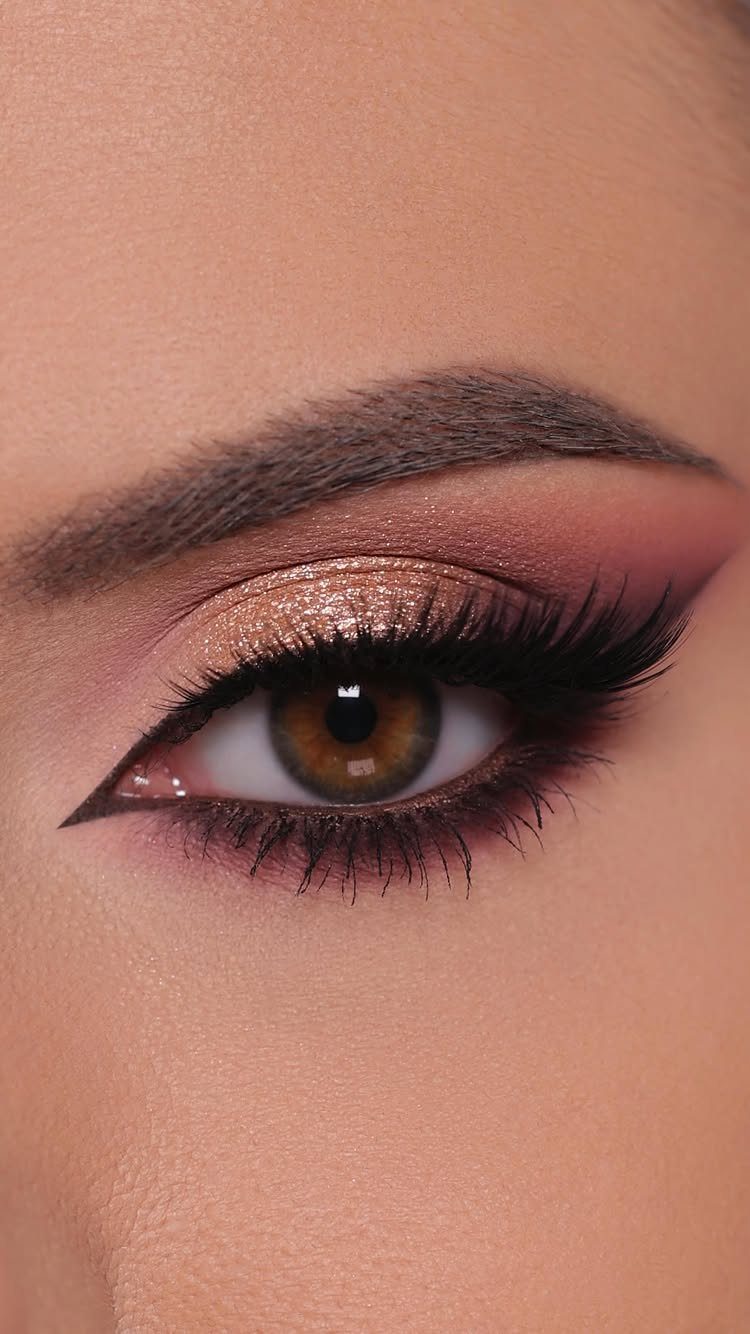
The lid carries shimmering pink with a layer of gold glitter concentrated at the center, giving dimension that shifts as you move.
A sharp wing extends the lashline and lifts the outer corner. Lashes are built up with volume and length, either through layered mascara or a set of falsies that add drama without looking cartoonish.
This level of definition holds up in photos and under mixed lighting.
It pairs best with a softer lip so the focus stays on the eyes. Allow extra time if you are not used to applying winged liner or lashes.
6. Contoured Cheekbones and Jawline
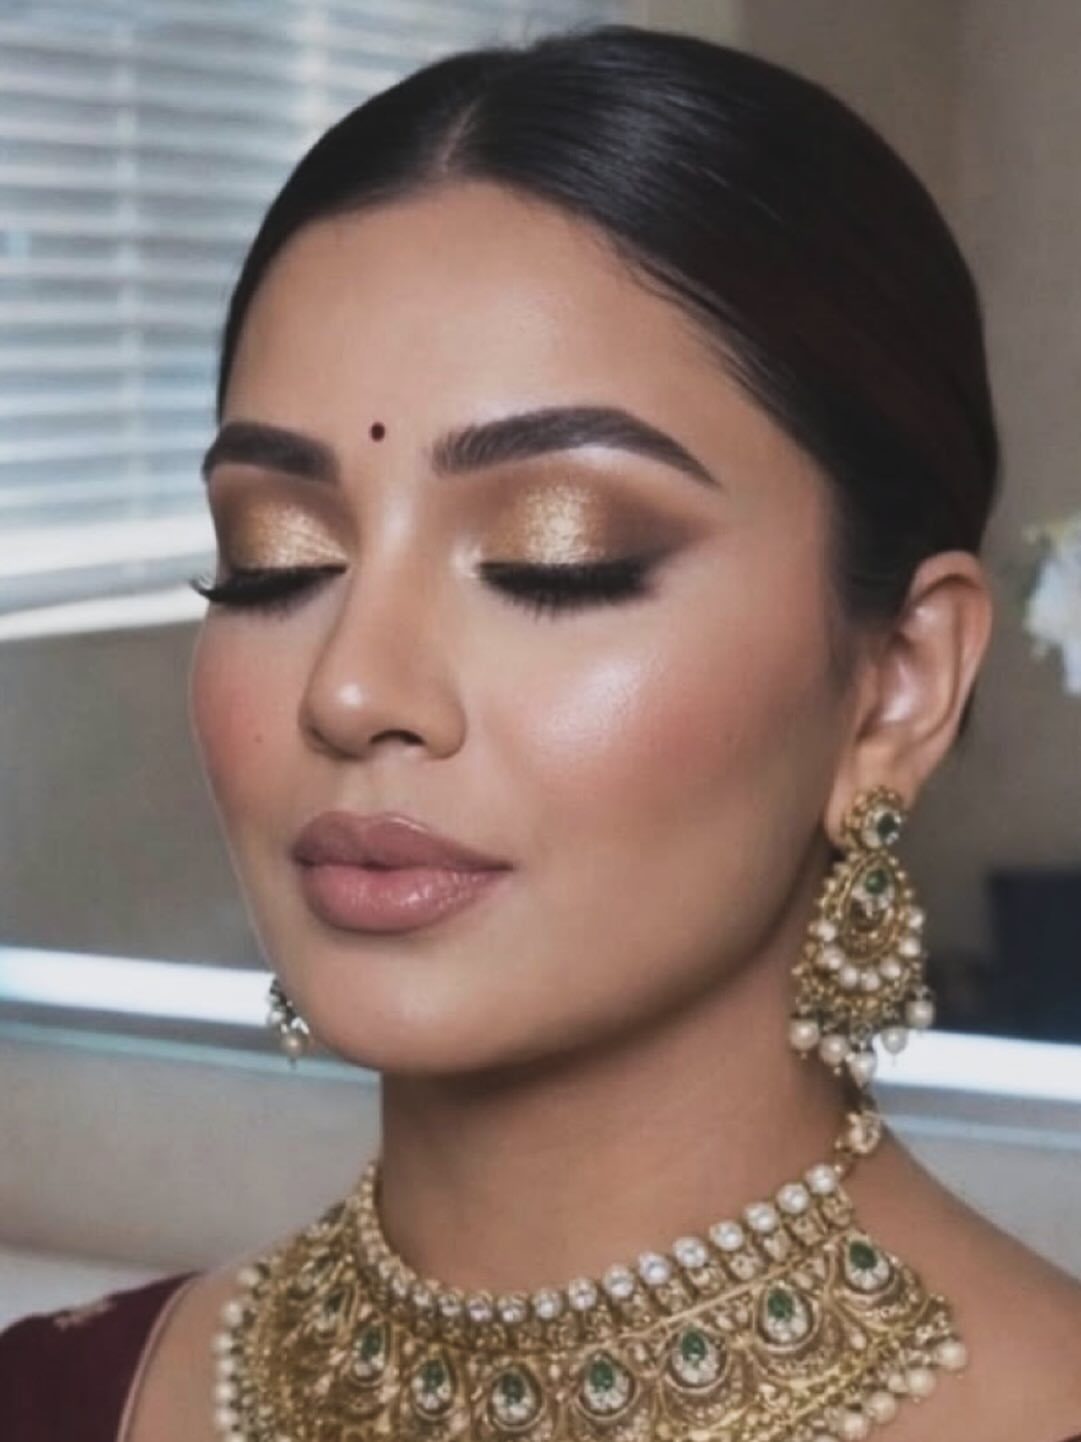
Contouring shapes the face by placing a cool-toned bronzer or contour powder in the hollows of the cheeks and along the jawline, then blending until the edges disappear.
The result is structure, not stripes. This look suits events where you want your features to hold up in professional photos or under strong lighting.
The eyes here take a warm gold shadow that complements the sculpted cheeks. Blush goes on the apples, just above the contour line.
Highlighter on the tops of the cheekbones finishes the effect. Skip heavy contour if your face is already angular or if the lighting will be soft and diffused.
7. Lash Extensions
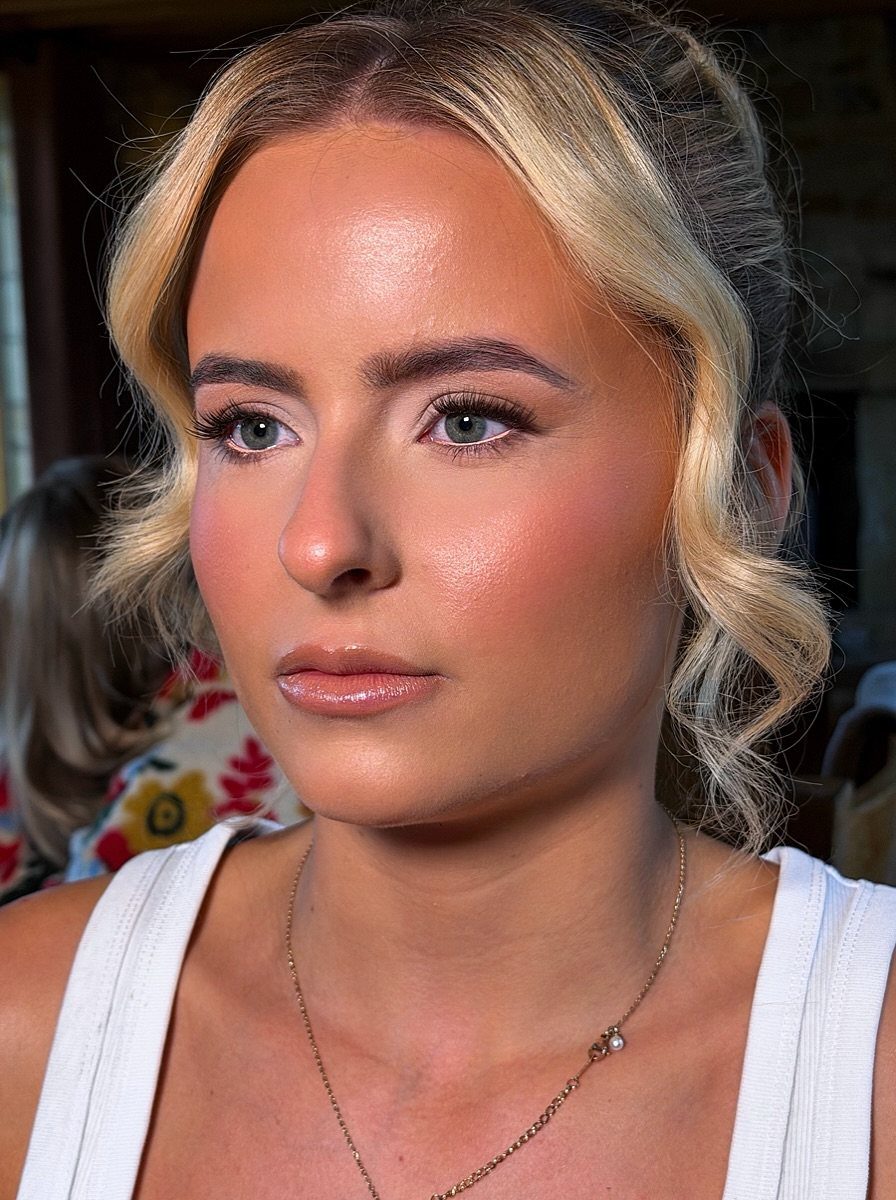
Extensions add length and volume that mascara alone cannot match, and they hold that effect through the entire event without smudging or drooping.
Applied individually to your natural lashes, they create a fuller lashline that opens the eyes and photographs well from any angle.
The trade is time and upkeep. Book the appointment a few days before the wedding so any irritation settles.
8. Smoke and Shimmer
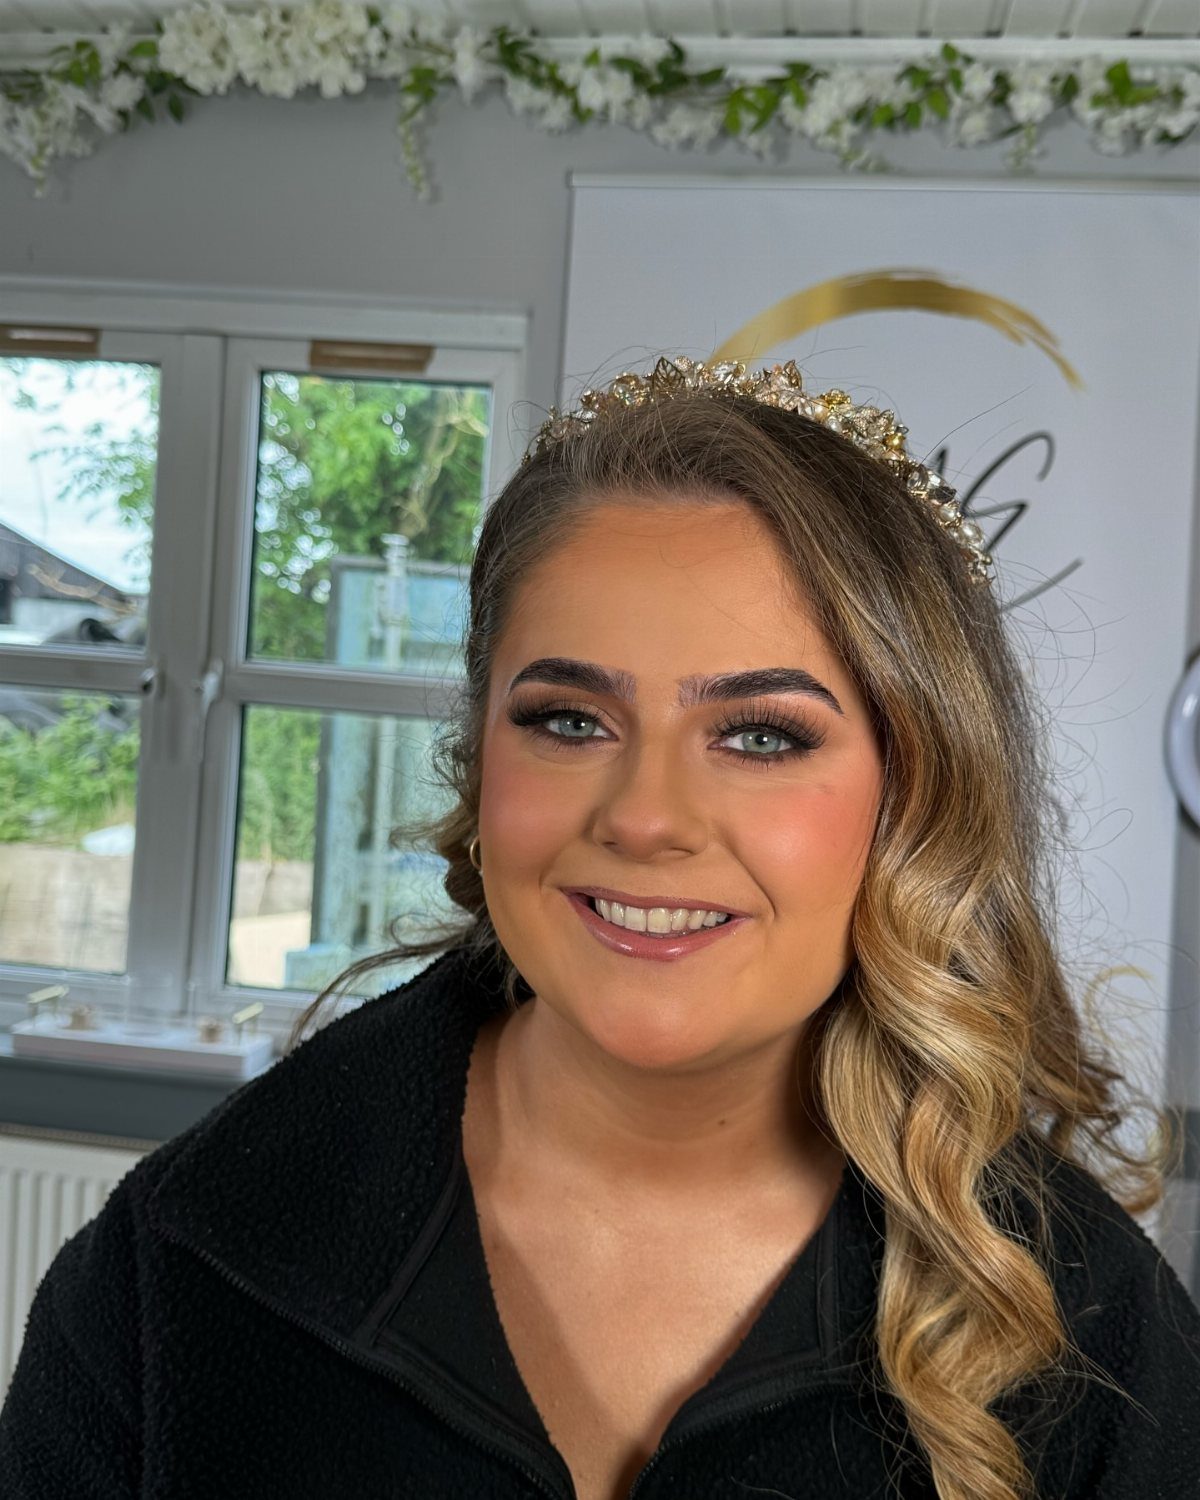
Layer them.
The lid takes a shimmery shadow in bronze or champagne, then a matte charcoal or taupe goes into the crease and outer corner to add depth. Blend where they meet so the transition reads soft, not striped.
This combination gives you dimension and sparkle without choosing between the two. It suits evening weddings and black-tie dress codes where a bit of drama fits the occasion.
9. Monochromatic Eyes, Cheeks, and Lips
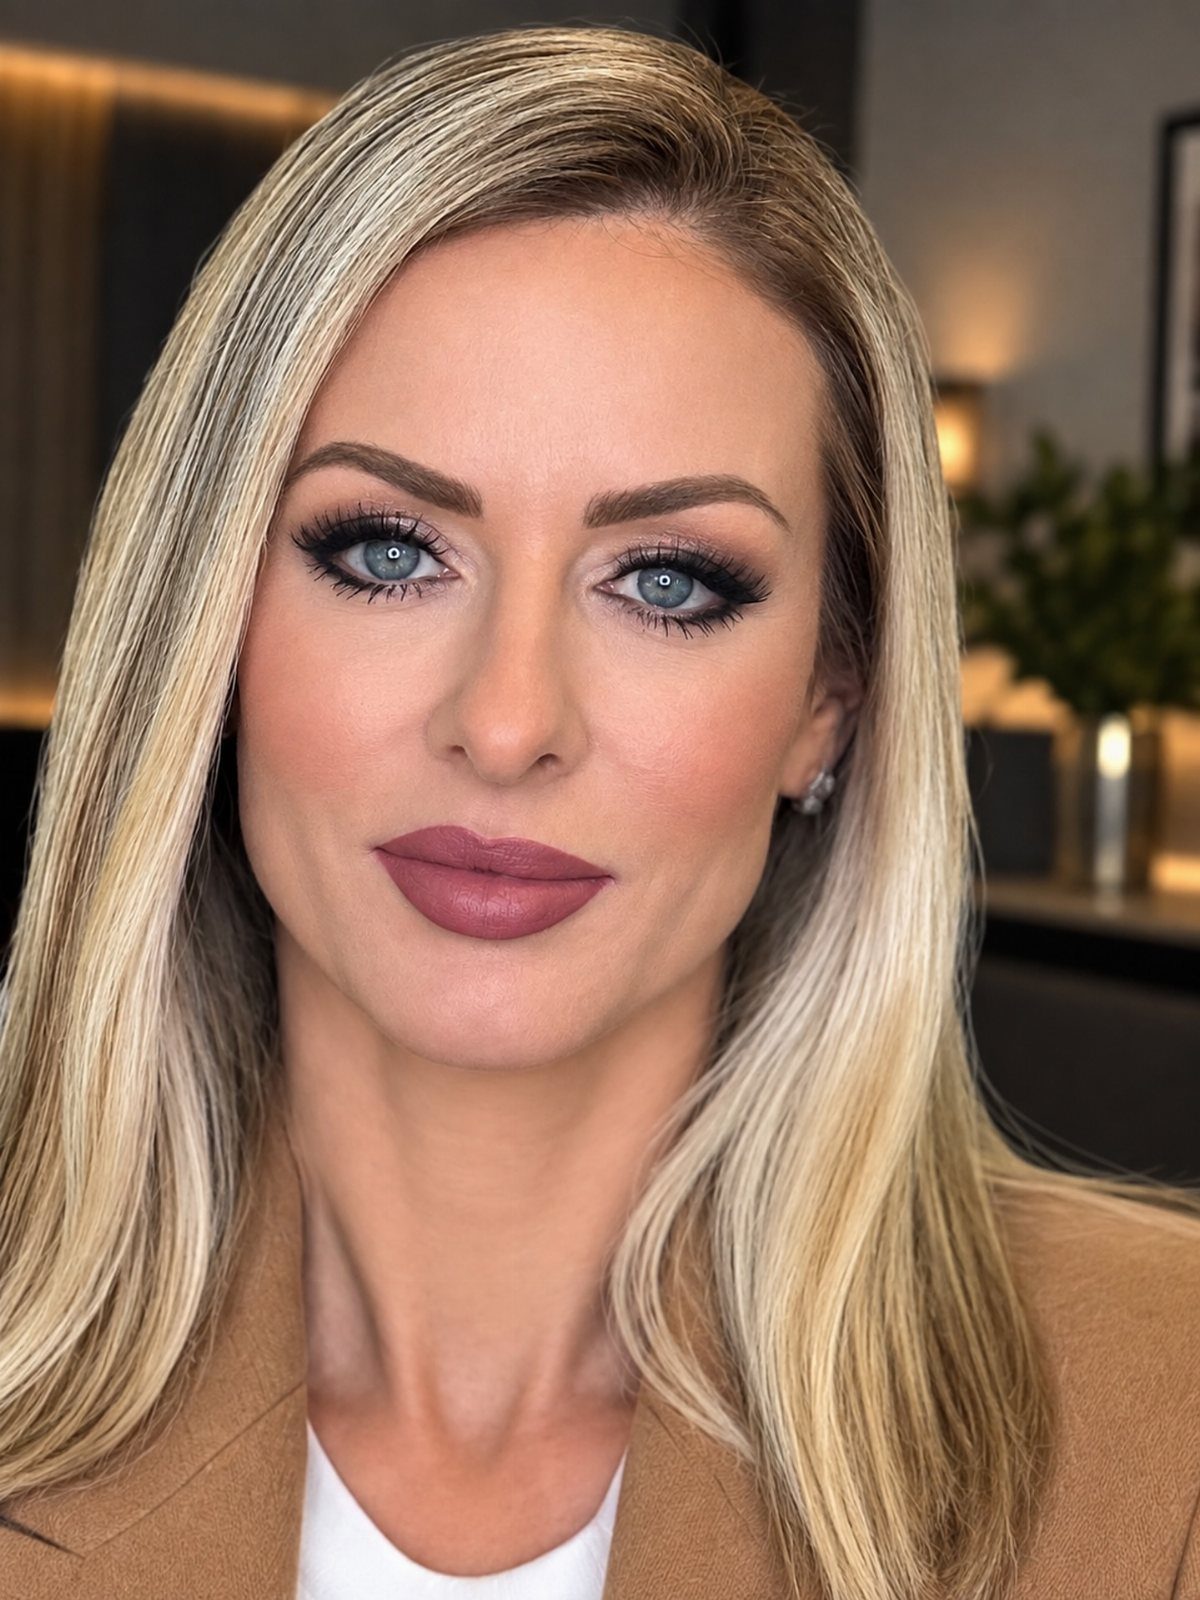
Using the same color family across the face creates a cohesive look that feels intentional without much planning.
Mauve or rose tones work well for this approach: a matte or satin shadow on the lids, cream blush on the apples of the cheeks, and a lipstick or gloss in a slightly deeper version of the same shade.
The effect is polished but not overdone. It simplifies your makeup bag if you are traveling to the wedding.
10. Pastel Makeup
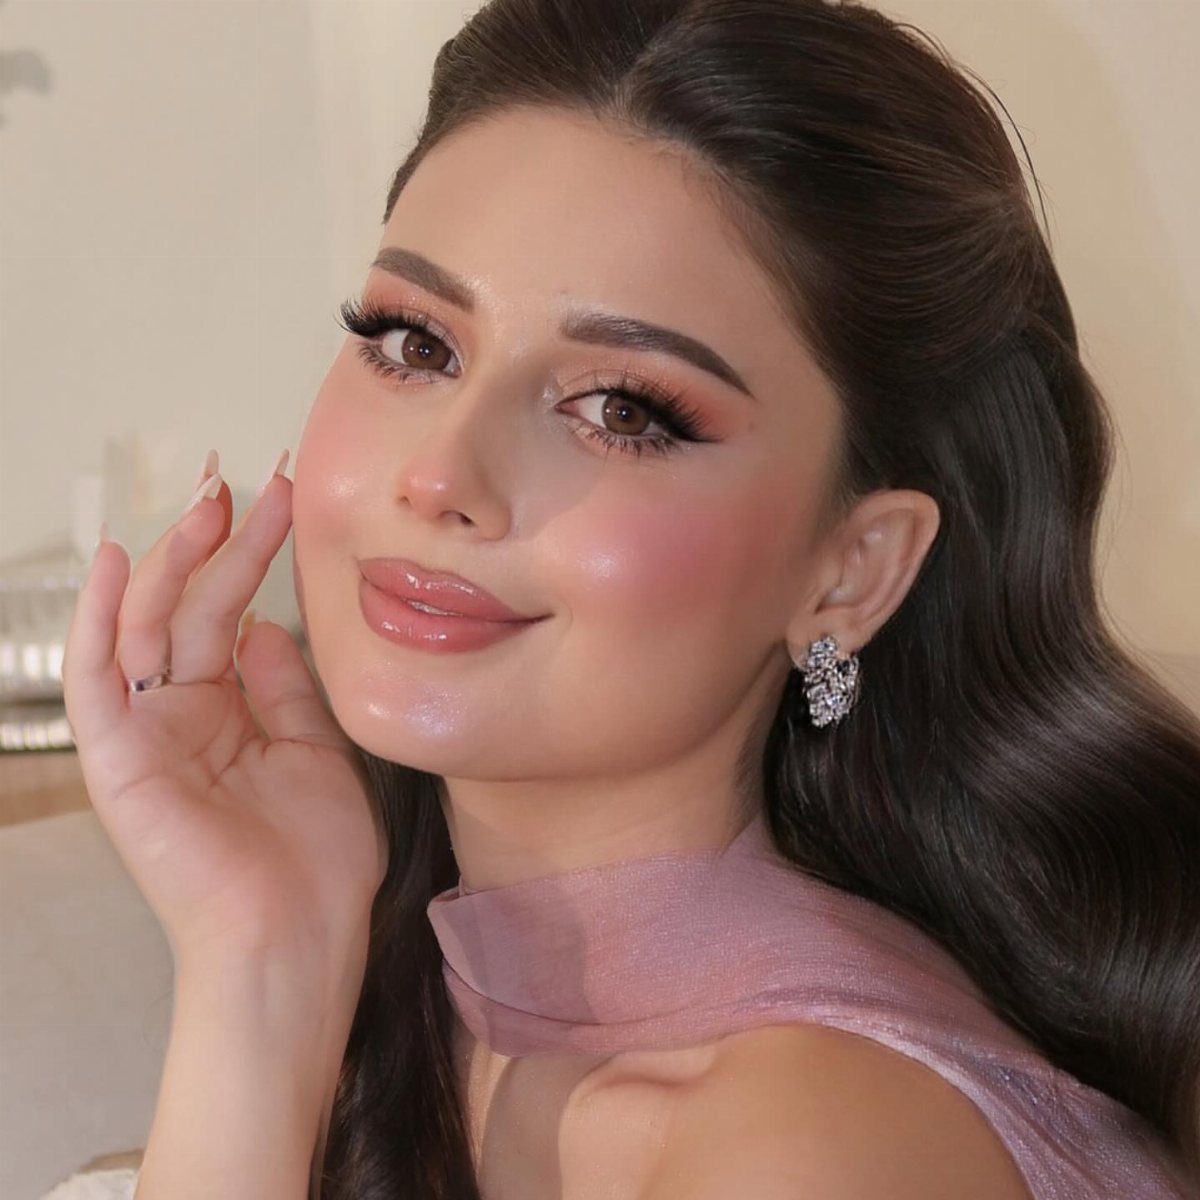
Soft pinks, lilacs, and peaches give a romantic finish that suits daytime weddings and garden settings. Apply them with a light hand so they enhance rather than overwhelm.
This style pairs well with floral prints and lighter fabrics. It skews young and delicate, so consider your overall outfit.
11. Nude Shades for Eyes and Lips
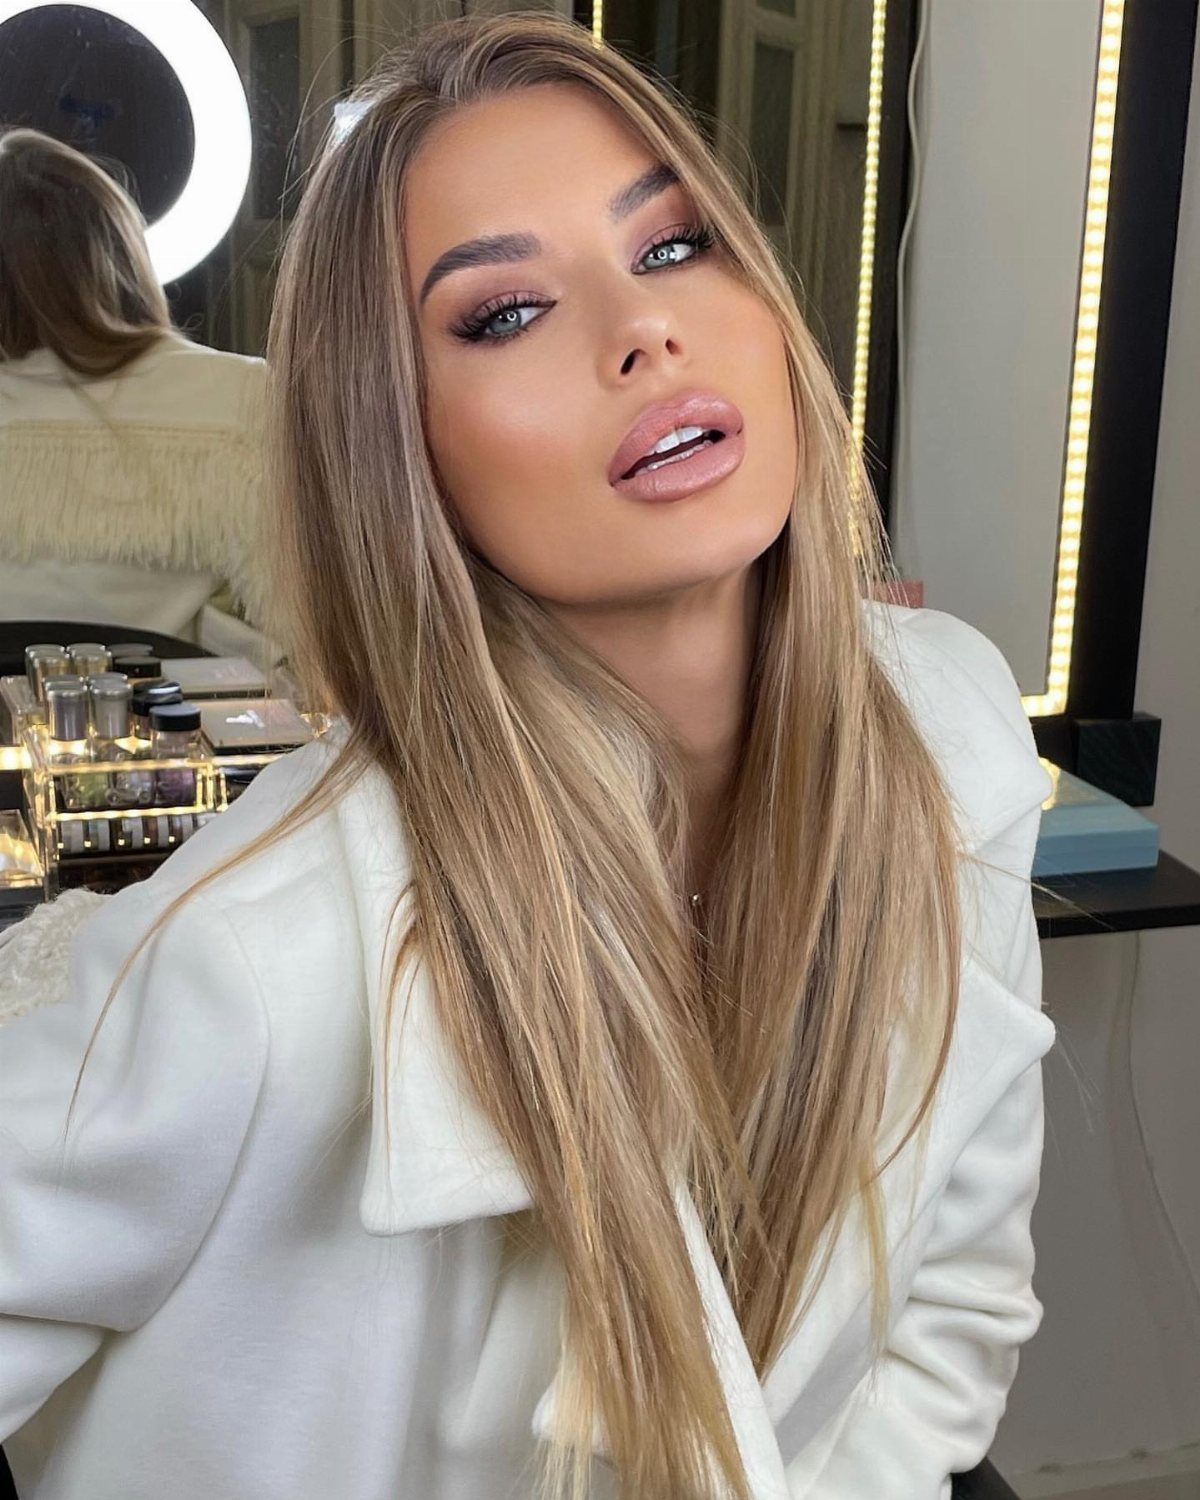
Neutral tones let your features show without competing with a bold dress or statement jewelry.
A beige or taupe shadow across the lid, paired with a nude or mauve lip, keeps the face balanced and clean. This approach suits any dress code and any time of day.
The result is understated and versatile. It works when you want your outfit or the venue to take center stage.
12. Inner Corner Eyeshadow Accents
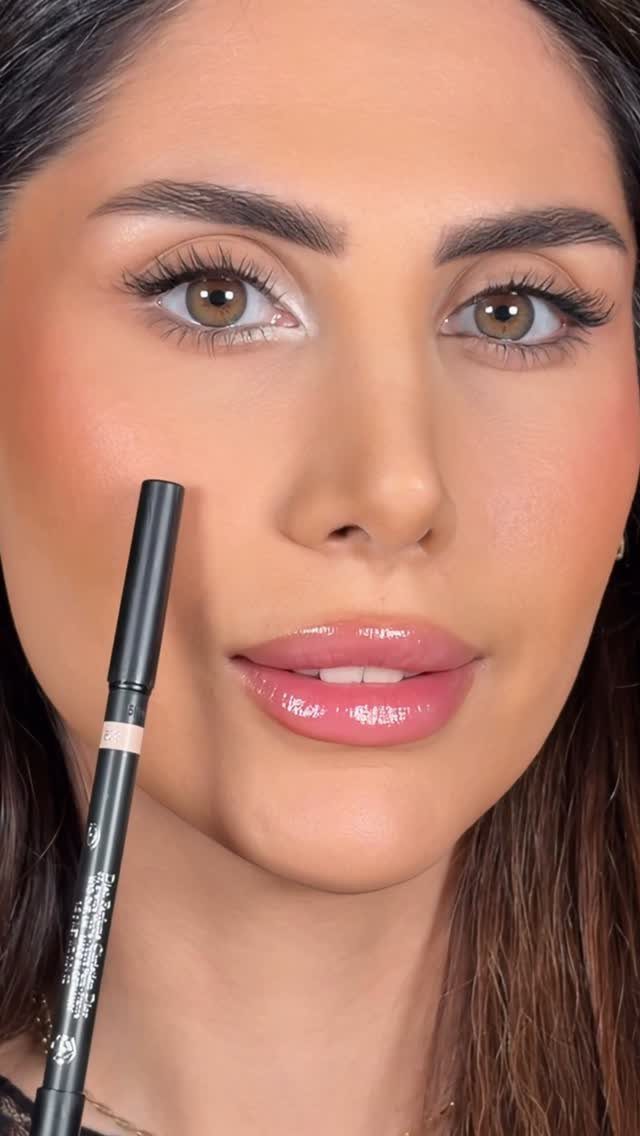
A dab of shimmer in the inner corner brightens the eyes and makes them appear wider and more awake.
White, champagne, or pale pink work for most skin tones. Apply it with a small brush or your fingertip, concentrating the color right at the inner corner and blending slightly onto the lid.
This detail takes seconds and adds a polished finish to any eye look. It photographs especially well in close-ups.
13. Peach Blush and Warm Tones
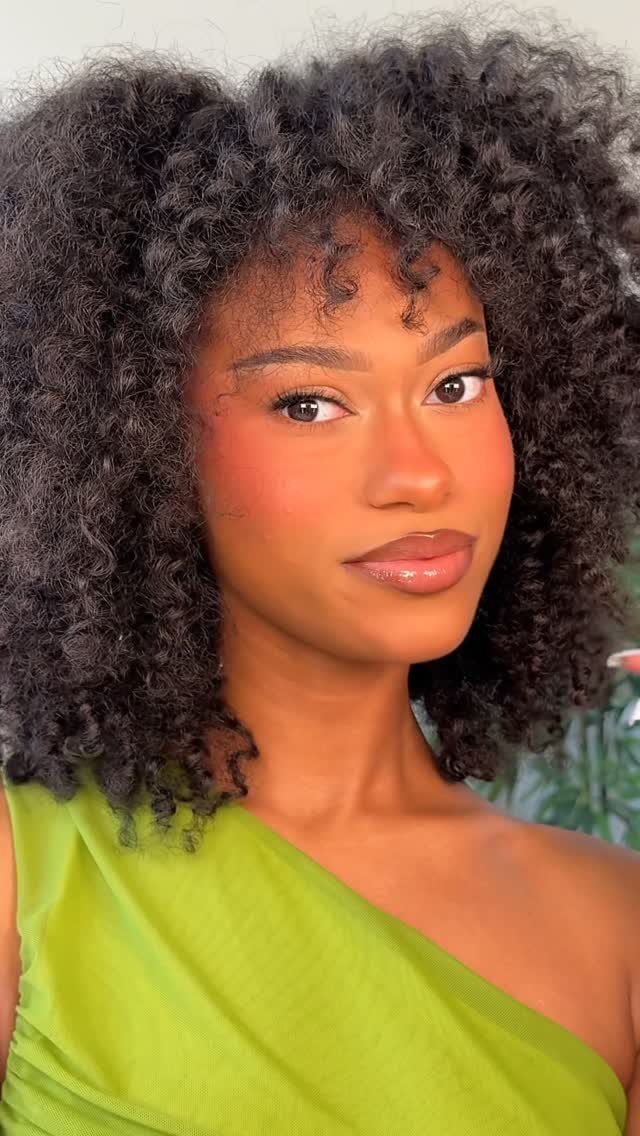
Peach blush warms the complexion and pairs naturally with bronze or terracotta eyeshadow. The result flatters medium to deep skin tones especially well, bringing out golden undertones without looking orange or overdone.
I sweep it onto the apples of my cheeks and blend upward, stopping just before the hairline. A cream formula gives the most natural finish and melds into the skin rather than sitting on top.
Pair it with a glossy nude or peach lip to keep the warmth consistent across the face. This look photographs beautifully in outdoor settings where natural light enhances the warm tones.
14. Pink and Purple Eyeshadow
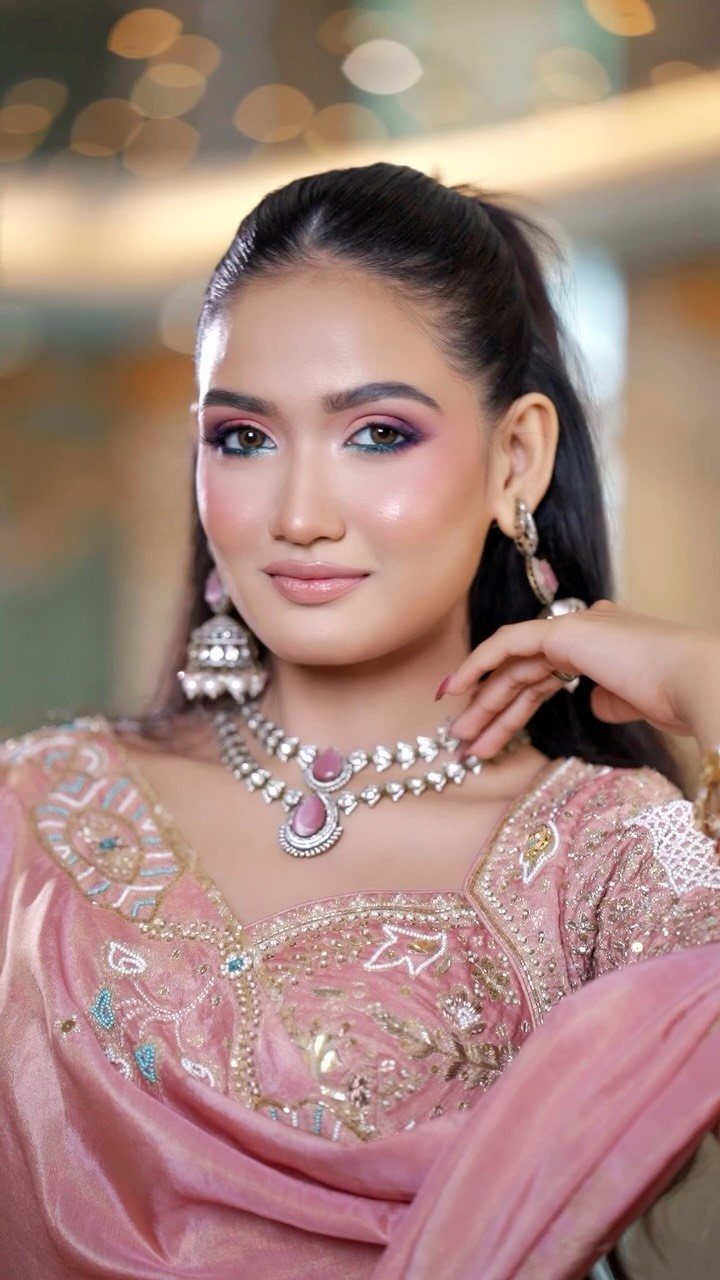
Blending pink into purple across the lid creates soft dimension without harsh lines.
The pink sits on the inner half of the lid, the purple deepens the outer corner, and the two meet in the middle with a few passes of a fluffy brush.
This color combination suits romantic or spring weddings and pairs well with traditional or embroidered outfits.
Keep the lips nude or soft pink so the eyes stay the focal point. The blend requires a light hand; build the color gradually rather than applying it heavily at once.
15. Blue and Silver Eyeshadow
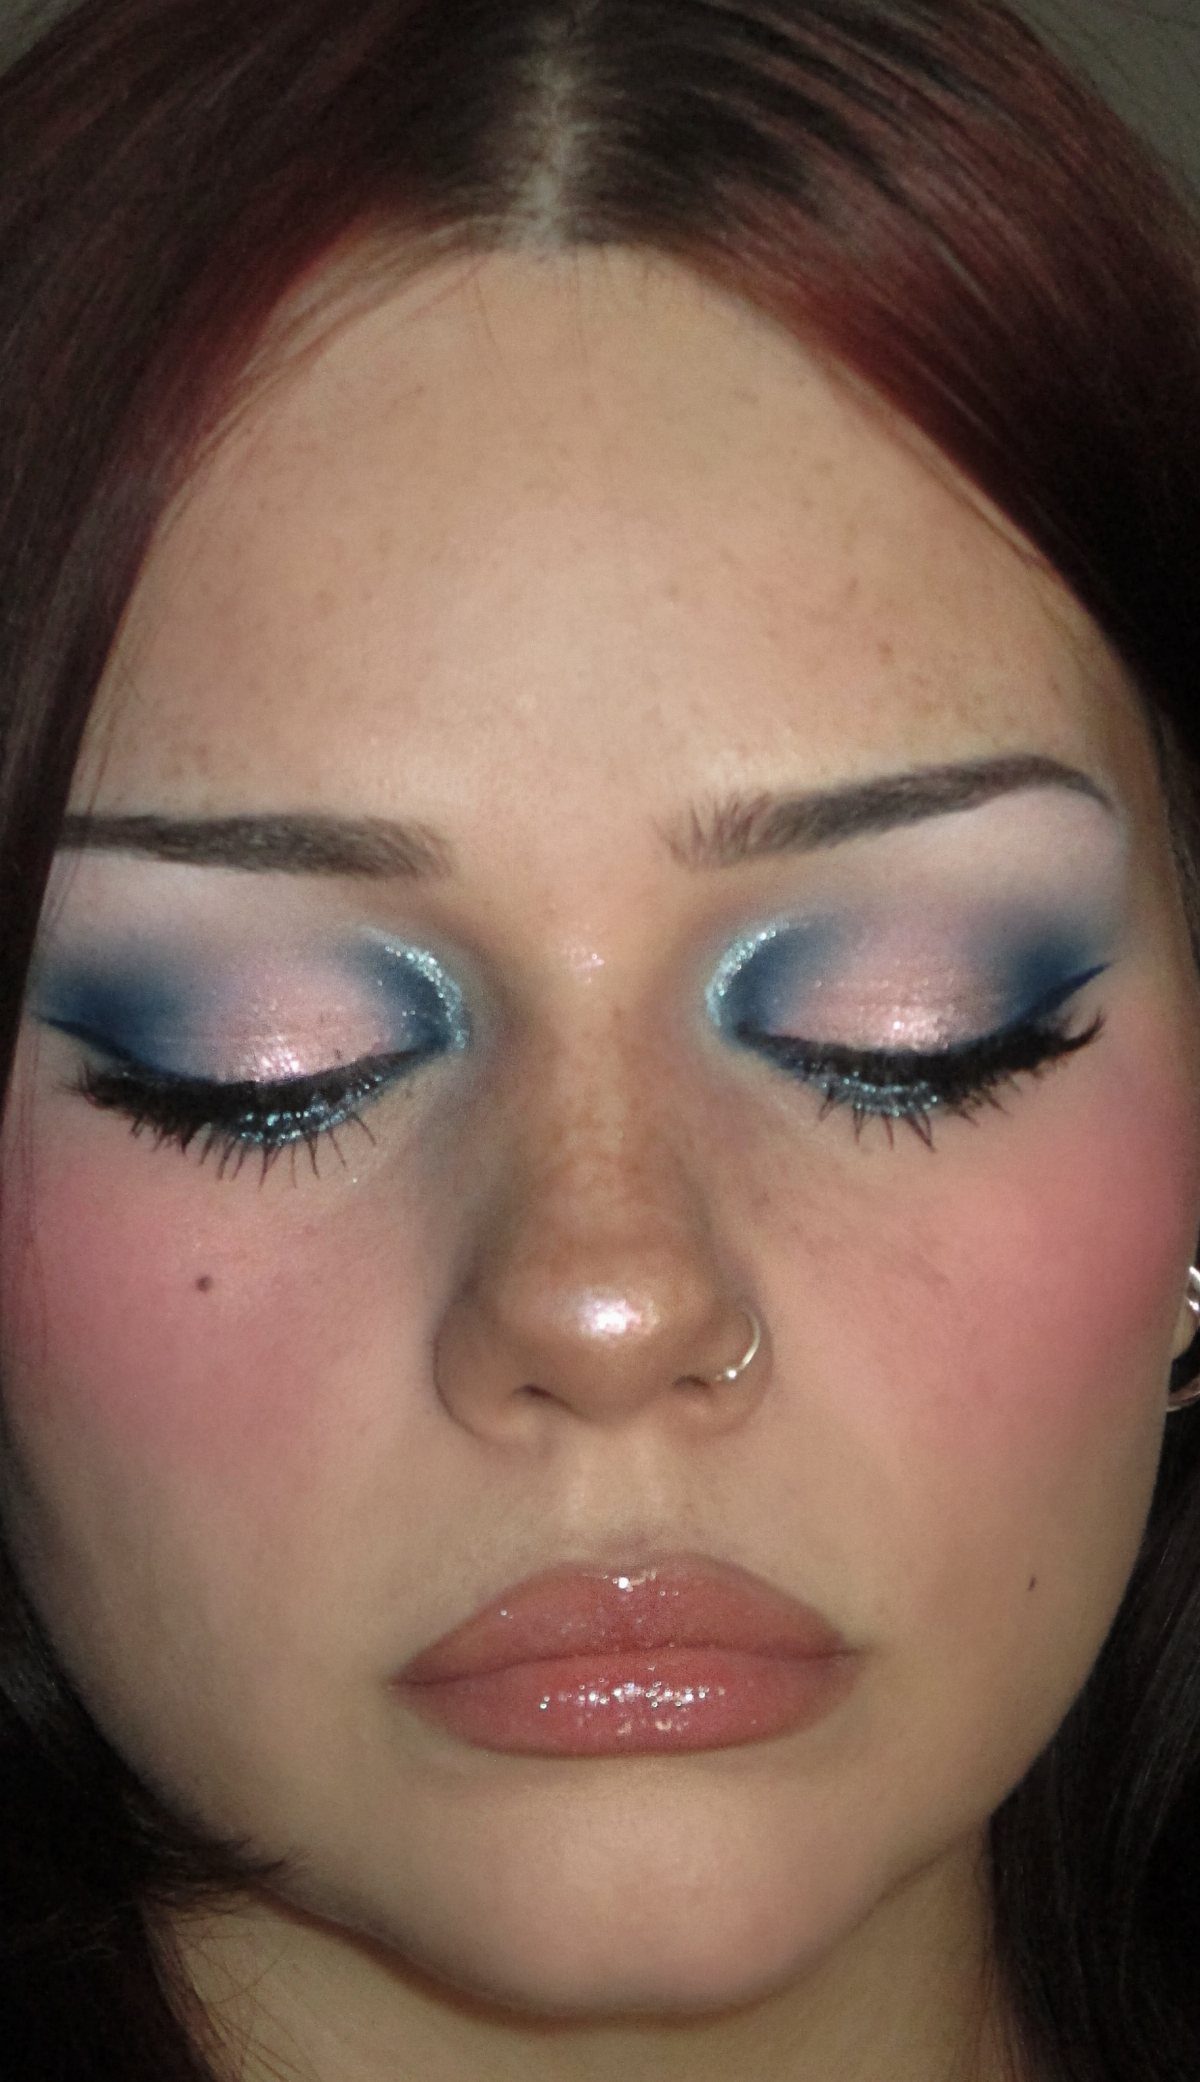
Blue and silver together give a cool, editorial finish that stands out in photos.
The silver brightens the center of the lid while the blue adds depth at the outer corner and along the crease. A black winged liner sharpens the shape and makes the colors pop.
This look suits evening weddings and works best when your outfit is neutral or metallic. Application takes practice if you are not used to bold color, so try it before the event.
16. Bold Lip Color
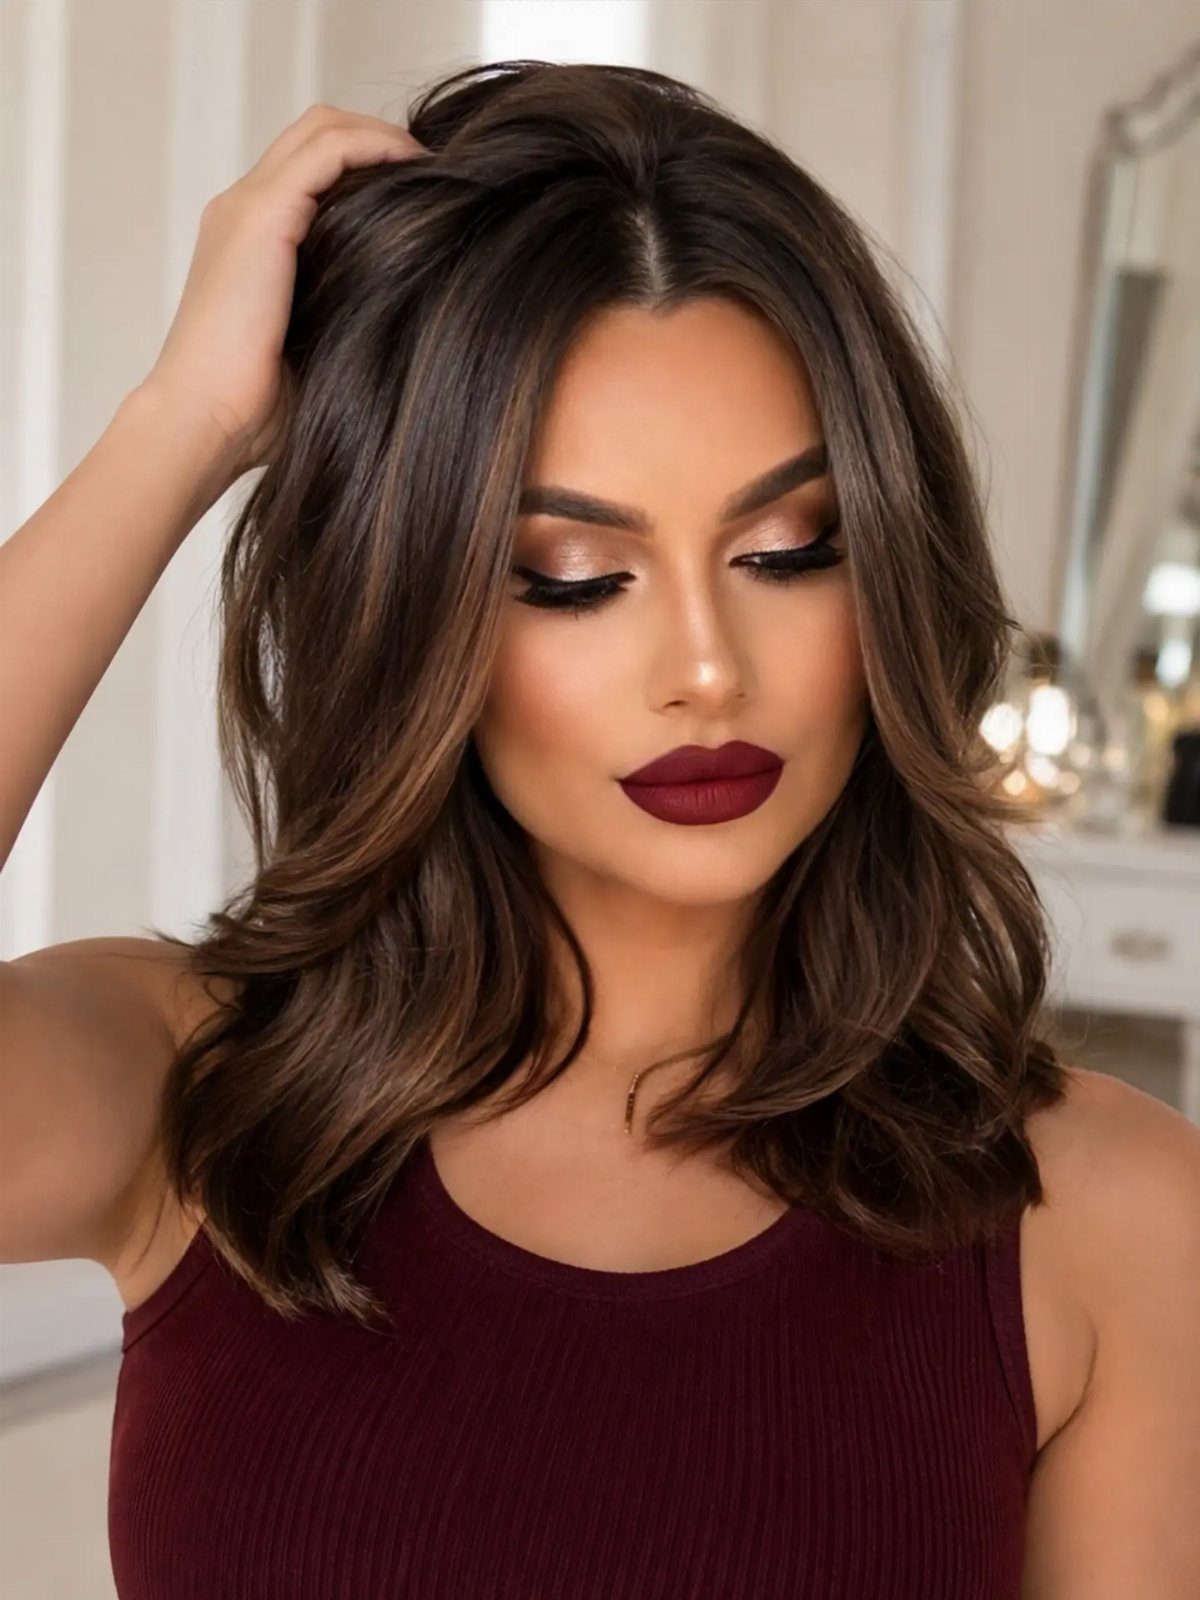
A red or berry lip pulls attention and adds polish without requiring elaborate eye makeup. Pick a shade that suits your undertone: true red for cool, orange-red for warm, berry or plum for deeper complexions.
Prep the lips with balm, then line them to prevent feathering. Blot once, reapply, and blot again for staying power.
Keep the eyes simple with bronze or neutral shadow and mascara. Bring the lipstick with you for touch-ups after eating or drinking.
17. Highlighter on Cheekbones and Brow Bones
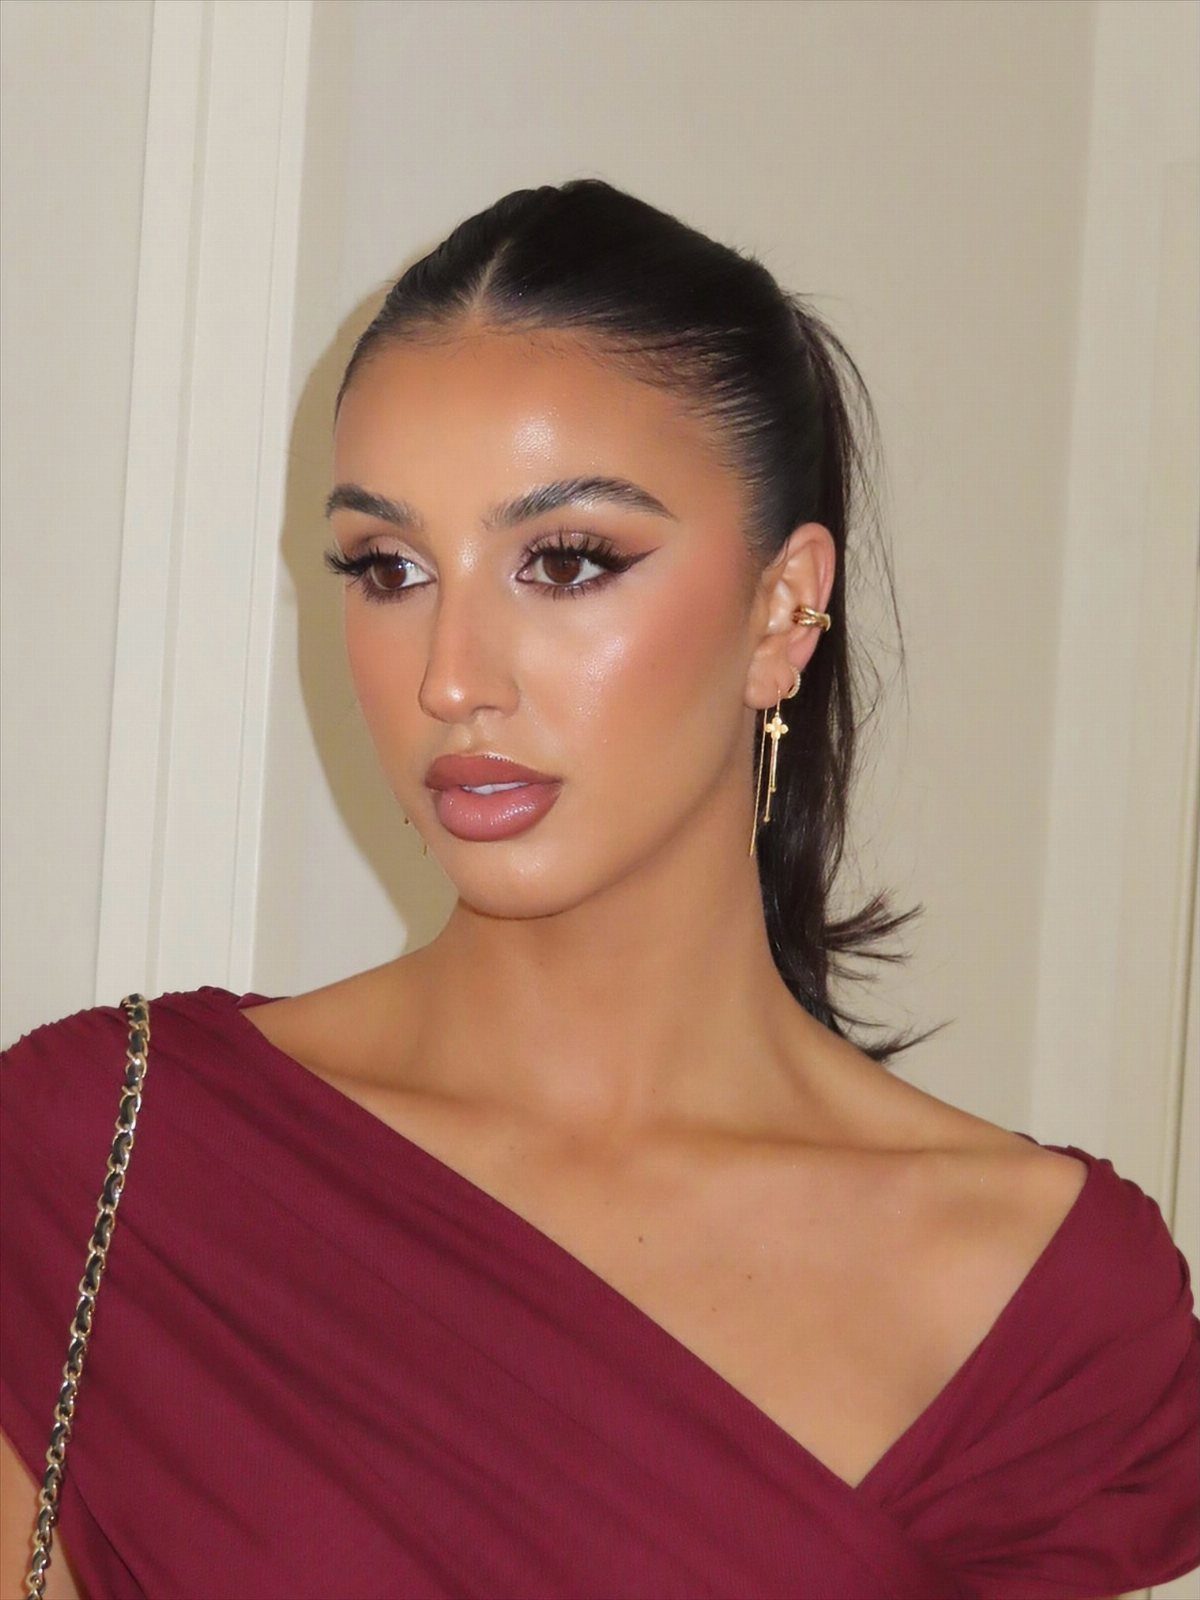
Highlighter catches light and lifts the face when placed on the tops of the cheekbones and just under the brow arch. A cream or liquid formula blends more naturally than powder and gives a wet, reflective finish.
Apply it with a small brush or your fingertip, tapping it onto the high points rather than dragging it across the skin. This technique suits all skin tones but shows up best in photos when paired with a dewy base.
18. Trimmed, Brushed Brows
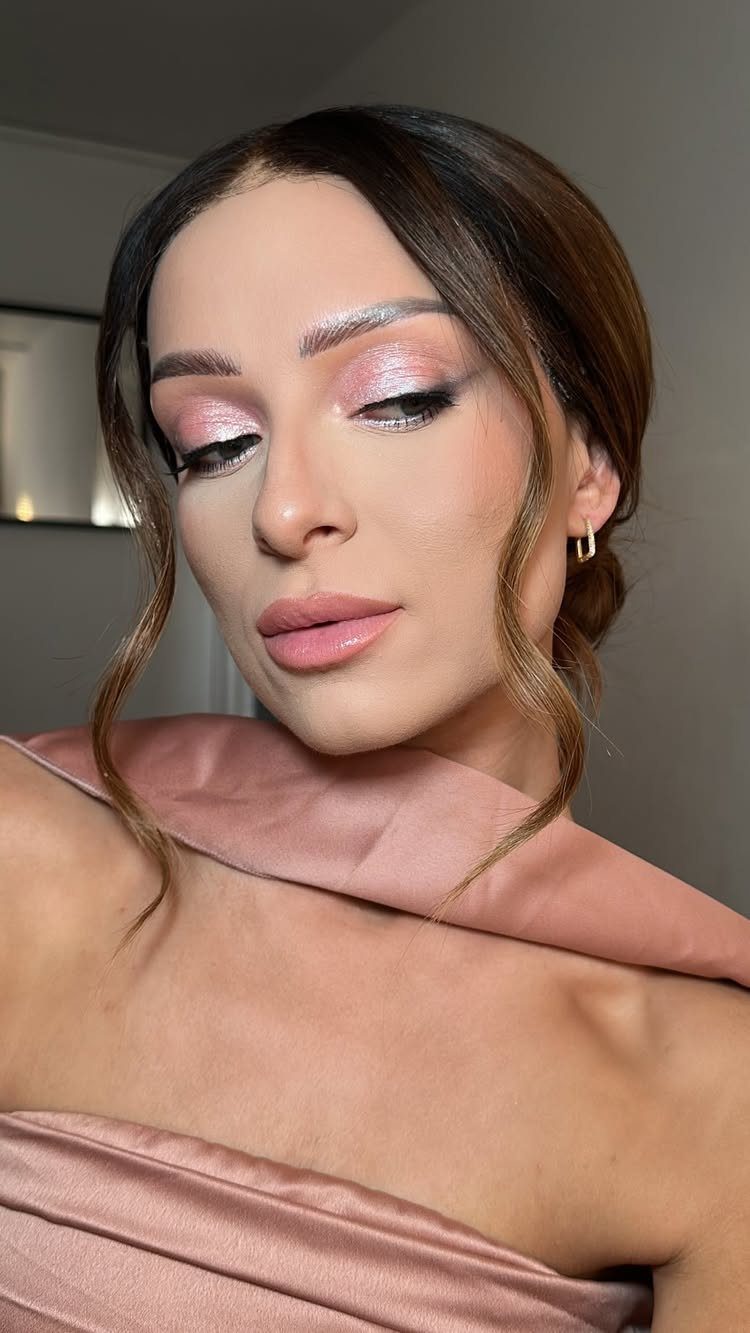
Groomed brows frame the face and hold the entire makeup look together.
Trim any long hairs with small scissors, then brush them upward and outward with a spoolie. Fill sparse areas with a pencil or powder one shade lighter than your natural color, using short strokes that mimic individual hairs.
Set them with a clear or tinted brow gel so they stay in place through the ceremony and reception.
This step takes minutes and makes a noticeable difference in photos. Well-shaped brows balance bold lip color or dramatic eye makeup without competing for attention.
19. Starry Studded Lids
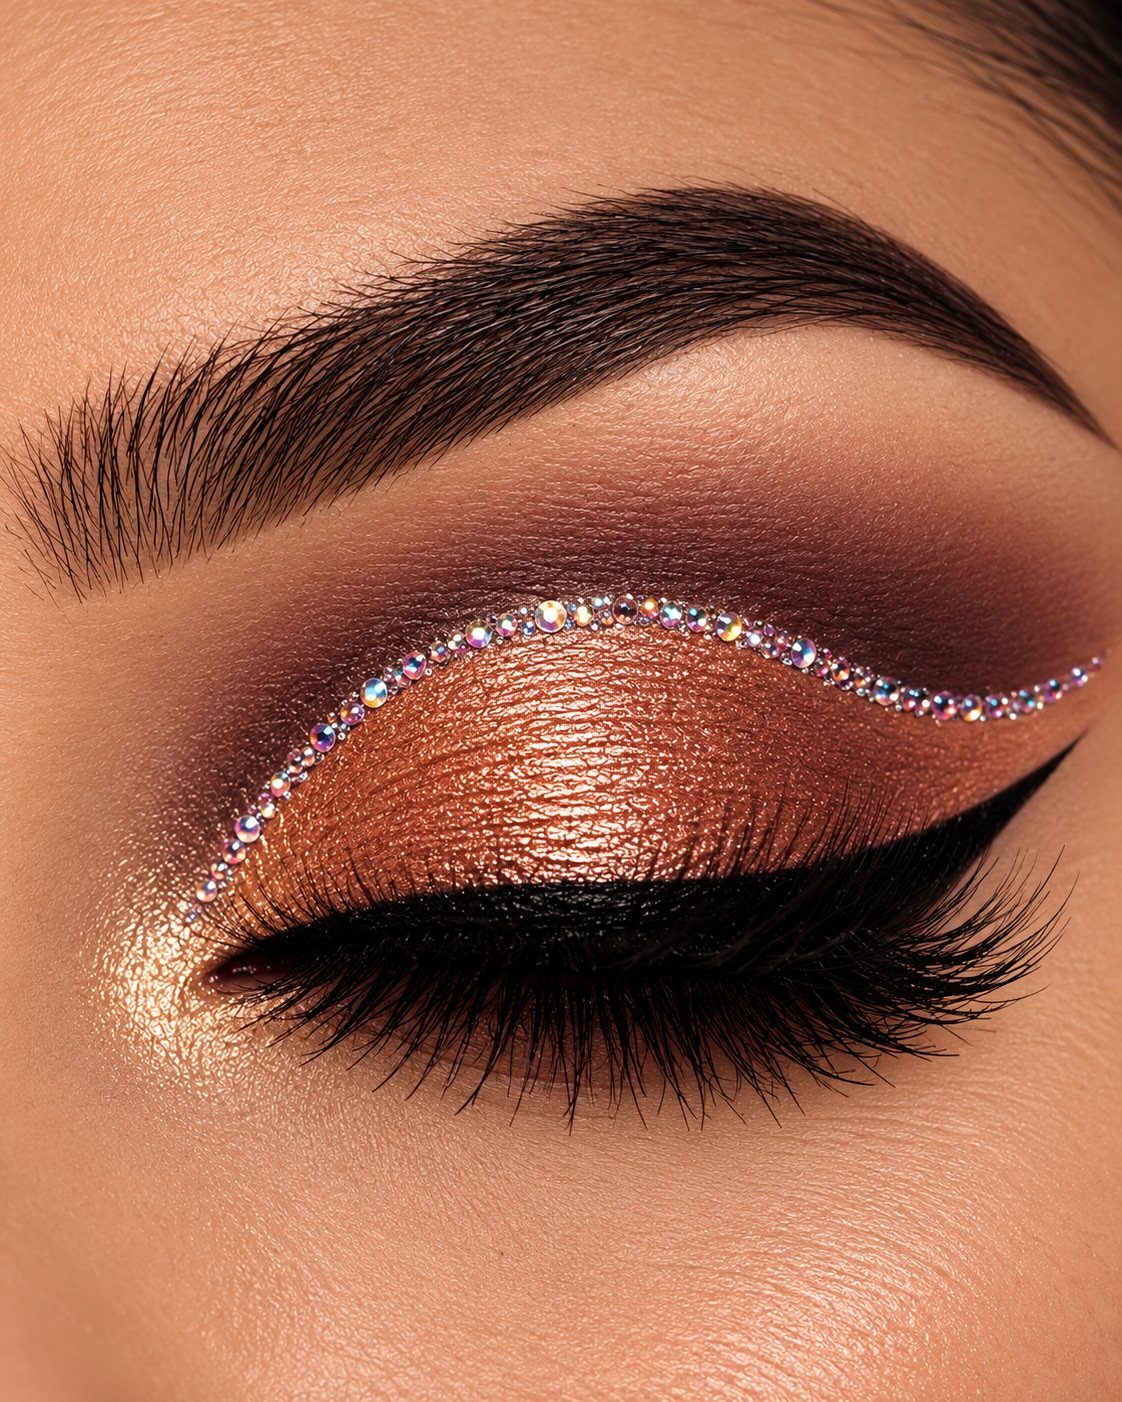
Rhinestones placed along the crease or lashline add a dressy detail that photographs beautifully and suits evening celebrations. The stones here follow the crease in a neat row, catching light with every blink.
Apply them after your eyeshadow is finished and set.
Use lash glue or cosmetic adhesive on the back of each stone, then press it into place with tweezers. Start at the inner corner and work outward, spacing them evenly.
They stay put through hours of wear but require a steady hand and a few extra minutes. This finish pairs best with a simple lip and suits cocktail or formal dress codes.
Choosing the Right Makeup
Match the formality of the event first. A black-tie reception calls for more definition and staying power than a backyard ceremony.
If the invitation lists cocktail attire, you have room for drama in either the eyes or the lips. A casual daytime wedding suits lighter application and softer colors.
Season affects both the palette and the formula. Spring weddings pair well with pastels and fresh tones, while fall and winter celebrations lean toward nudes and deeper shades.
Warm weather means your makeup will likely take on a dewy finish whether you planned for it or not, so build that into your look or prep to control it.
Venue lighting matters in photos. Outdoor ceremonies in natural light flatter most looks, but indoor receptions with dim or mixed lighting require more contrast to read clearly on camera.
Makeup Longevity Tips
A setting spray locks everything in place once your makeup is finished. Hold the bottle at arm’s length and mist in an X, then a T, and let it dry before you head out.
Powder only where you need it. If you set your entire face, you risk dulling the finish and flattening dimension.
I concentrate it on my T-zone and anywhere I know will get shiny by the reception. A translucent formula works for most skin tones and will not alter your foundation color.
Simple makeup applied with intention actually lasts longer than heavy layers.
Thick coverage shifts and melts through hours of movement, eating, and heat. A lighter base stays put and requires fewer touch-ups between the ceremony and the reception.
Skin Preparation
Moisturizer goes on first and needs a full minute to absorb before you add anything else. If you rush it, your foundation will slide around instead of adhering to your skin.
Primer comes next, but only where you need it. If your skin gets oily, concentrate it on your T-zone and anywhere shine usually appears.
Pat it in rather than rubbing, which pushes the product around instead of letting it settle. Primer creates a smooth surface for foundation and helps makeup grip through several hours of wear.
If you deal with under-eye circles or blemishes, handle color correction now before you apply foundation.
A peach or orange corrector neutralizes darkness, and a green one tones down redness. Use a light hand and blend the edges so nothing sits visibly on the skin.
Frequently Asked Questions
What makeup do I need as a wedding guest?
Primer, foundation or tinted moisturizer, concealer, mascara, blush, and a long-wearing lip color are the core pieces. These basics cover any dress code without requiring a full makeup collection.
Should a wedding guest do hair or makeup first?
Hair always comes first.
Heat tools, hairspray, and product can disturb foundation or smudge eyeshadow if applied after your makeup is done. Finish your hair completely, then move to your face.